I found these wonderfully recipes on cupcake bakeshop by Chockit and i cant wait to try them.
Sweet Potato Cupcakes
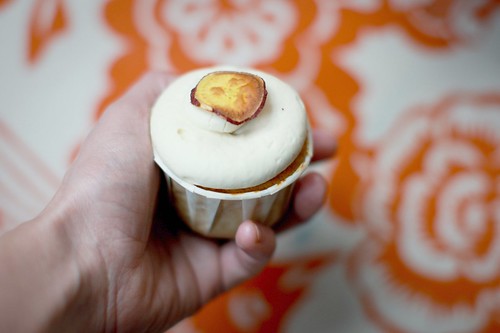
I will be honest, these cupcakes came about by accident. My intention was a honey-almond cupcake, but I had this newly discovered sweet potato flour and wanted to try it. As soon as I added the flour to the batter I knew I had something else on my hands. Quite anxious, I pushed forward with the recipe, all along feeling a cupcake disaster was sure to ensue. Thankfully I was altogether wrong. The cupcakes turned out utterly delicious. I was surprise by their texture – quite billowy and soft, but also with a toothsome texture from the almond meal. And the sweet potato flavor was there, but subtle allowing the honey and almond to shine through as well.
The frosting? What can I say – this is my current absolute favorite frosting. It’s just a notch above it’s cousin, the salted caramel frosting recipe, that is my go-to frosting for just about anything. But bourbon has it’s adult appeal and it’s my top-pick for adult events.
You may start noticing a trend with this and future recipes… gluten-free. We have discovered that our daughter is wheat or gluten sensitive (we haven’t narrowed it down, but are basically cutting out gluten all around). This recipe is naturally gluten-free, but if you wanted to transform it into a straight up honey-almond cupcake and don’t mind gluten, just swap the sweet potato flour for all-purpose flour and omit the xanthan gum.
Sweet Potato Cupcakes
~24 cupcakes / 350 degree oven
3/4 cup (1-1/2 sticks) unsalted butter, room temperature1. Preheat the oven to 350°.
1/4 cup granulated sugar
2 cups almond meal
4 large eggs
3/4 cup high-quality honey
3/4 cup buttermilk
1 cup sweet potato flour
1 teaspoon xanthan gum
2 teaspoons baking powder
1/4 teaspoon salt
2. Beat butter until softened. Add sugar and beat until light and fluffy, about 3 minutes.
3. Add almond meal and beat to combine.
4. Add eggs, one at a time, beating until well combined.
5. Measure the flour, xanthan gum, baking powder, and salt into a medium bowl and whisk to combine.
6. Measure out the honey and buttermilk. Stir to combine.
7. Add about a third of the dry ingredients to the butter/sugar and beat to combine. Add about a half of the wet ingredients and beat to combine. Continue adding, alternating between dry and wet and finishing with the dry.
8. Scoop batter into cupcake cups about 2/3′s full. Bake cupcakes for about 22-25 minutes or until a cake tester comes out clean.
Bourbon Caramel Cream Cheese Frosting
4 tablespoons brown sugar1. Heat brown sugar, cream, butter, salt over medium high heat whisking until sugar is dissolved. Cook for another minute.
4 tablespoons whipping cream
2 tablespoons butter
pinch salt
4 tablespoons bourbon
2 packages phili cream cheese, room temp
1 cup butter, room temp
6 cups confectioner’s sugar
2. Pour in bourbon and stir to combine. Take off heat and let cool.
3. In the bowl of an electric mixer, beat cream cheese and butter until soft.
4. Add the confectioner’s sugar and beat to combine.
5. Add three tablespoons of the bourbon caramel (you might have some left over) and beat to combine. You can always add more, but the frosting may end up pretty soft.
Assembly
1. Frost.
2. Top with homemade sweet potato chips.

Almond Orange Cupcakes
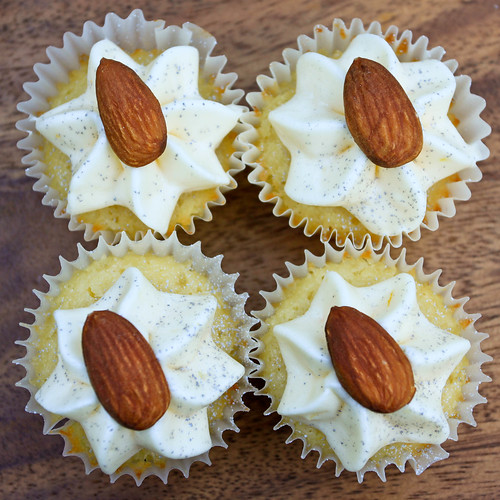
These cupcakes are very almondy. Almond is the predominant flavor but you catch the citrus as well, especially in the frosting. These cupcakes are great for the winter season and pair well with an Italian themed dinner. I made about 100 mini of these cupcakes along with 100 mini chocolate with salted caramel cream cheese frosting for an event. Both were a hit. The second is my go-to recipe for parties – always a crowd-pleaser.
If you follow Kay Kupcakes blog on Facebook, you know that I have been promising the recipe for Honey Bourbon cupcakes. Well, the last batch still weren’t quite right! I will be testing these out again very soon and hope to have a successful recipe to post this month. I might tweak it to fit this competition. I think I can’t resist entering this one, it’s just too up my alley.
Almond Orange Cupcakes
~15 cupcakes / 350 degree oven
7 ounces almond paste (not marzipan)1. Beat almond paste at low speed to loosen up, about 30 seconds.
1 cup sugar
1/2 cup whole milk ricotta cheese
1 stick butter, unsalted/room temp
4 eggs, large/room temp
2/3 cup flour
1/4 teaspoon baking powder
1/8 teaspoon salt
2 tablespoons fresh orange juice
zest of one half an orange
2. Gradually add sugar while beating at low speed.
3. Continue to beat at low speed for 1 minute or so.
4. Add the ricotta and beat to combine.
5. While beating at low speed, add a tablespoon of butter at a time, waiting for the butter to incorporate until adding the next pat.
6. Stop the mixer, scrape the bowl, beat at medium for about 2 minutes until fluffy.
7. Crack eggs into a bowl and break up with a fork.
8. At low speed gradually add eggs about a tablespoon at a time, waiting for the eggs to incorporate until adding the next bit.
9. Beat again at medium speed for about 2 minutes.
10. Measure out flour, salt, and baking powder into a bowl and whisk to combine.
11. With a rubber spatula, fold flour mixture into the cake batter until combined.
12. Mix in orange juice and zest.
13. Scoop batter into cupcake liners, fill about 1/2 inch from the top (3/4 full).
14. Bake at 350 for about 20 minutes or until cake tester comes out clean.
Note: These cupcakes are moist and don’t rise too much so you can fill the papers pretty full. They also stay flat if you like that.
Cream Cheese Frosting
8 ounces or 1 package of Philly cream cheese1. Bring butter to room temperature by letting it sit out for a couple of hours.
1 stick butter
3-4 cups sifted powdered sugar
2 tablespoons fresh orange juice, plus more to taste
zest of one half an orange
zest of one half a lemon
2. Beat butter and cream cheese at medium speed until creamy.
3. Sift 3 cups of the powdered sugar into the bowl, add the juice and zest, and beat until combined.
4. Add more sugar and/or orange juice until you get to the consistency, flavor, and sweetness you like.
Note: You can also add a little natural orange extract if you want to pump up the orange flavor.
Assembly
1. Frost cupcakes.
2. Top with an almond or candied orange peel.
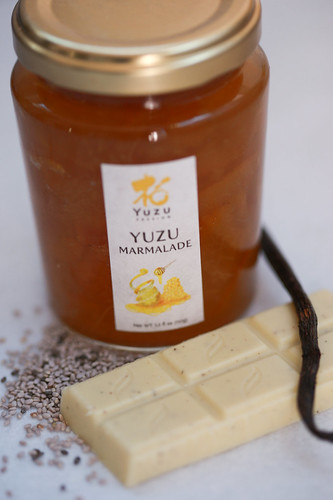
Yuzu White Chocolate Cupcake

Two sources of previous inspiration collided recently. A lunch at Ozumu introduced me to yuzu and then a couple of weeks later a pass through the Village Market in the Ferry Building turned up a jar of yuzu marmalade. I took it as a sign that a yuzu cupcake was in order.
Yuzu is making its rounds on dessert menus these days often paired with white chocolate. I decided to go the same route. I thought about a third flavor, but wanted to keep this first experiment pretty simple partly because I was taking them to a party with a lot of kids. The yuzu marmalade is quite tart and at least my kid wasn’t a fan. She ate up the rest of the cupcake though. The adults agreed that the yuzu and white chocolate combination was tasty. The white chocolate whipped cream is a light alternative to buttercream when you don’t want something too sweet.
Oh, and I don’t think that I have mentioned that I am on Facebook. If you prefer to get your updates there…
White Vanilla Bean Cupcakes
~18 regular-sized cupcakes / 350 degree oven
1 stick (1/2 cup) butter, room temperature1. Beat butter on high until soft, about 30 seconds.
1-1/2 cups sugar
2 cups all-purpose flour
1-1/2 teaspoons baking powder
1/8 teaspoon salt
1 cup milk
1 teaspoon vanilla extract
1/2 vanilla bean
4 large egg whites
2. Add sugar. Beat on medium-high until light and fluffy, about 3 minutes.
3. Whisk together flour, baking powder, and salt in a bowl.
4. Measure out milk and vanilla and mix together. Add the seeds scraped out of 1/2 of a vanilla bean.
5. Add about a third of the dry ingredients to the mixing bowl and beat to combine. Add about a half of the milk and beat to combine. Continue adding, alternating between dry and wet and finishing with the dry.
6. In a separate bowl, beat the egg whites until firm. Fold egg whites gently into the batter until you can see no more streaks.
7. Scoop into cupcake papers about half full. Don’t overfill.
8. Place cupcakes in the oven and turn the oven down to 350 degrees. Bake for 20-22 minutes until a cake tester comes out clean.
Note: These cupcake will rise some and then shrink back a bit. If you are using regular cupcake papers, the paper shrinks with them. With the firmer cupcake papers I use, they pull from the side. I don’t worry about it too much as it’s not obvious once the frosting is on top.
White Chocolate Whipped Cream from Gourmet Productions
2 cups heavy cream1. Pour heavy cream into a medium sized bowl and warm over a bain marie (water bath).
9 ounces white chocolate, I used Green & Blacks
1 vanilla bean
2. Split the vanilla bean and add it to the cream.
3. Chop the chocolate and add it to the cream once its steaming. Whisk to melt chocolate.
4. Once smooth remove from the water bath and chill until cold in the refrigerator. Whisk occasionally so a film doesn’t form on top.
5. Whip with a whisk attachment on high speed until for about 3 minutes until it’s frosting consistency.
Assemble
1. Fill the cooled cupcakes using the cone method with yuzu marmalade.
2. Frost.
3. Garnish with what you have on hand. I had some chia seed!

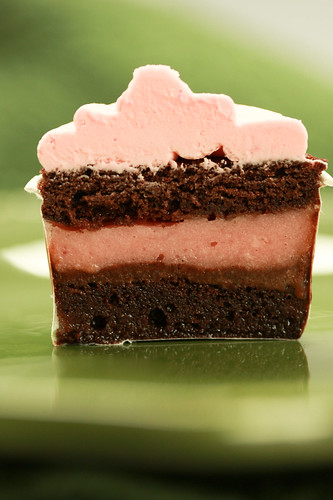
Cherry Bomb Cupcakes with Meringue Frosting
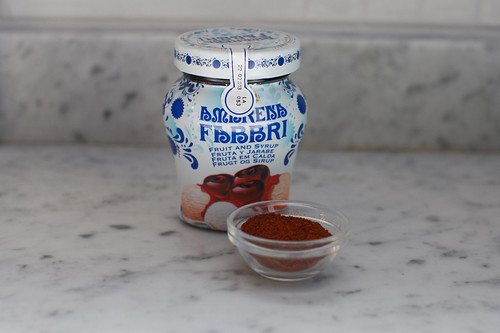
I felt the need to give these cupcakes a name – they had that much personality. I was about to add half as much chili as planned, but thought why not and dumped it all in. The result? Chili cherry chocolate cupcakes with a good kick. Funnily enough, “cherry bomb” was my ring name when I was an amateur kick boxer. I got that name from the cherry tattoos on my arms and my explosive power, I am sure… My fighting days are well passed me, but a taste explosion is well within my repertoire.
I purchased a jar of Italian wild cherries in syrup based purely on the attractive container. The jar lay ignored in a drawer while I struggled with what to do with the gluten-free chocolate cupcake recipe as a base for something I intended to bring to a party. A trip to the ferry building resulted in a 13 dollar jar of yuzu jam (for a later recipe – it better be tasty!) and I was still without ideas. The cherries called to me from their cool, dark spot and finally inspiration hit. But cherries and chocolate are pretty run of the mill. I decided on the chili so these cupcakes wouldn’t be forgettable.
I was hearing good things at the party. The cupcakes were spicy but that was appreciated. I liked the combination of the chocolate, chili, and tart but sweet cherries.
Gluten-Free Chili Chocolate Cupcakes
~16 regular-sized cupcakes / 350 degree oven
3.5 ounces (100 grams) Valrhona 85% cacao (or any bittersweet chocolate)1. Chop the chocolate and transfer into the bowl of a standing mixer.
1-1/2 sticks (172 grams) butter
1 cup + 2 tablespoons (223 grams) sugar
4 eggs
1/2 cup + 2 tablespoons (40 grams) quinoa flour, gluten-free (or all purpose flour for non-gluten free)
1/4 cup cocoa powder, unsweetened
2 teaspoons ancho chili powder
1 teaspoon ground cayenne pepper
1 teaspoon baking powder
1/8 teaspoon salt
1 teaspoon xanthan gum (if using gluten-free flour)
2. Add the butter to the chocolate and place the bowl over a pan of simmering water. Stir until the chocolate melts and the butter is combined.
3. Remove from heat and stir in the sugar. Let the mixture cool for 10 minutes.
4. Measure out the flour, cocoa, chili powder, cayenne powder, baking powder, salt, and xanthan gum (if using) into a medium-sized bowl. Whisk together.
5. Transfer the cooled chocolate/butter mixture to the electric mixer and beat for 3 minutes.
6. Add one egg at a time, mixing for 10 seconds between each.
7. Add the flour mixture and mix to combine.
8. Scoop into cupcake cups only 2/3s full. Bake all the cupcakes at 350 F for 25 minutes or until a toothpick comes out clean.
Note: If the oven is not hot enough than these cupcakes may over-flow. One way to be safe is to either fill 2/3′s full or another trick I use is to preheat to 375, then drop the heat to 350 once I put the cupcakes in. I also rotate the pans after 15 minutes of baking. It is safe to gently move them at that point and I find the lower back of my oven to be a bit cooler.
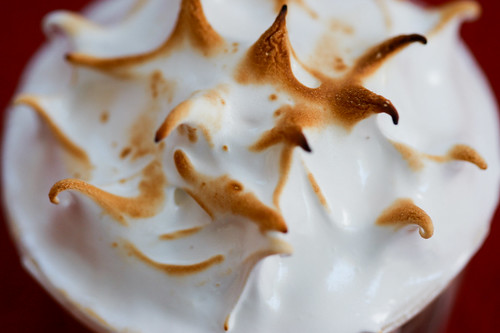
Meringue Frosting
4 egg whites1. Combine egg whites and sugar into the mixing bowl of your stand mixer and set over a bain marie (water bath).
1 cup sugar
2. Whisk by hand for a few minutes until the sugar is dissolved or preferably until the mixture reaches 110 degrees Fahrenheit. (Apparently 160 is safest. I have never tried that so can’t tell you if it will still be ok for the frosting. So if you are concerned use pasteurized eggs.)
3. Transfer bowl to electric mixer, beat on medium speed for 10 minutes.
4. Beat on high speed until stiff glossy peaks form, about 5 to 10 minutes more.

Assemble
1. Fill the cooled cupcakes using the cone method with cherries. I used jarred cherries in syrup and included one whole one and some chopped up ones.
2. Frost.
3. Toast with a torch if you have one.

Watermelon-Chocolate Ice Cream Cupcakes
It’s summer. And in most parts of the US when it is summer, it is warm. Maybe even *hot*. In San Francisco, it’s foggy, drizzly, and 55 degrees. Despite the fact that I have to wear a jacket and scarf when heading out in the morning, I am still thinking of summery things – like ice cream. I have been itching to make an ice cream cupcake and finally got around to it this weekend.
I have done these before – yummy concoctions consisting of layers of cake, ice cream, and frosting – but for my two previous attempts, I made my own ice cream or sorbet. This time around I was hoping to be inspired by my favorite ice cream shop – Humphry Slocombe.
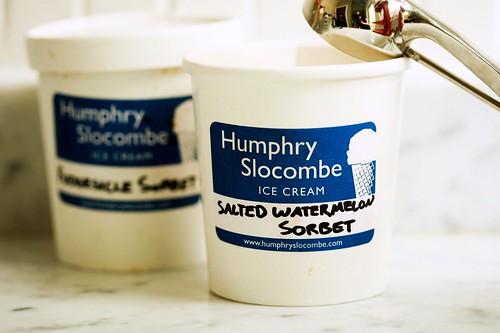
Humphry Slocombe is walking distance from my house. For a while there Naomi and I would head over just about every other Saturday for a cone. We stopped by Friday evening to pick up a couple pints for the cupcake project. (It’s a good time to go, around 6pm on a weekday, there is no line…) The color of the salted watermelon sorbet immediately caught my eye. I confirmed with the guy behind the counter that the fudgsicle sorbet would pair well – he had tasted the combination earlier in the day.
Indeed this cupcake combo is a winner. I am surprisingly pleased with how the watermelon buttercream frosting turned out and the watermelon-chocolate combination, even with a hint of salt, is wonderfully tasty. It feels like summer almost!
The recipes below will make you 12 to 14 ice cream cupcakes with some ice cream and frosting left over.
Chocolate Cake
1 sheet pan / 350 degree oven
1/2 cup (1 stick) butter, room temp1. Beat butter until softened. Add sugar and beat until light and fluffy, about 2 minutes.
1 cup + 2 tablespoons sugar
2 large eggs, room temp
3/4 cup flour
1/2 teaspoon baking powder
1/4 teaspoon baking soda
1/8 teaspoon salt
1/2 cup high quality unsweetened cocoa powder like Valrhona brand
1/2 cup milk
1 teaspoon vanilla
2 Add eggs one at a time and beat until well combined.
3. Measure the flour, baking powder, baking soda, salt, and cocoa powder into a small sized bowl and whisk to combine.
4. Measure out the milk and vanilla and stir to combine.
5. Add about a third of the dry ingredients to the butter/sugar and beat to combine. Add about a half of the milk/vanilla and beat to combine. Continue adding, alternating between dry and wet and finishing with the dry.
6. Spread the batter evenly onto a sheet pan that has been covered in parchment paper and greased well with butter.
7. Bake for about 20-22 minutes or until a cake tester comes out clean.
Note: Let the cake cool fully in the pan. After about 30 minutes, I flipped the cake on to a second sheet pan and then removed the parchment paper. This seemed to make it easier to cut the rounds, but may have been unnecessary.
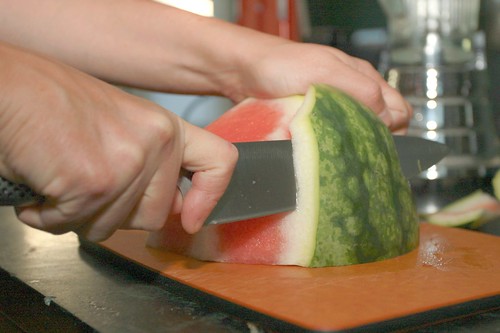
Watermelon Syrup
~ 2 cups fresh watermelon meat1. Peel and chop the fresh, seedless watermelon.
2. Using a blender or food processor puree the watermelon.
3. Separate at least 2/3 cup watermelon juice from the pulp by pressing it through a metal sieve.
4. Bring at least 2/3 cup of watermelon juice to boil over medium heat. Reduce to a simmer and boil the juice for about 10-15 minutes or until reduced by almost half.
5. Once again separate the juice from any solids by pouring the a metal sieve. Allow to cool.
Watermelon Buttercream Frosting
2 sticks (1 cup) unsalted butter, room temperature1. Using an electric mixer, beat the butter at medium speed until creamy.
4-5 cups powdered sugar
1/4 cup watermelon syrup
2. Add 2 cups of powdered sugar and beat, occasionally stopping to scrape the sides and bottom of the bowl, until light and fluffy.
3. Add watermelon syrup and beat to combine.
4. Add more powdered sugar to arrive at the consistency and sweetness you like.
[optional] Add pink food coloring and beat to combine.
Candied Watermelon Rind Rounds
leftover watermelon rind1. Using a small circle cookie cutter (about 1/2″ diameter) stamp out 14-16 watermelon rind rounds.
1/2 cup sugar
1/4 cup water
2. In a small saucepan combine the sugar and water and bring to a boil.
3. Add the rounds, reduce heat to low, and cook for about 10 minutes.
4. Take off the heat and let sit for about 5 minutes.
5. Remove the rounds and place on a wire grate to cool.
6. After cooled, roll the rounds in sugar.

Assemble
Something like this set
1. Find the right sized cutter to get a cupcake round for the bottom and top of the cupcake. I had to use to very different sized cutters.
2. Eyeball how many cupcakes you can get out of the sheet pan before you start cutting. I eyeballed about 14 which is what I got.
3. Stamp out the bottoms and tops.
4. Fill each cupcake paper with a bottom round of cake.
5. Take your first ice cream flavor out of the freezer and transfer it into a bowl. Mix it with a wooden spoon to soften.
6. Scoop a small scoop of ice cream into each cupcake. Smooth out with the back of a spoon. Transfer the cupcakes to the freezer to chill for 20-30 minutes.
7. Now repeat with the second ice cream flavor and chill again for about 10 minutes.
8. Now top with the last cupcake round and chill again for 10 or so minutes.
9. Now top with buttercream frosting and a candied watermelon rind round.
Note: Store cupcakes in the freezer. Let them sit at room temperature for 10 or so minutes before serving. Firm ice cream works best for these projects otherwise the ice cream gets very melty…
Baking in Bulk
I rarely if ever veer from the standard post of recipe with pictures. I don’t do book reviews, product reviews, talk about cupcakes in general, etc. This blog is about recipes I create and pictures that go along with them. I am veering with this post though.
I baked for an event a month or so back and I had been thinking about posting just about that process. As I would heartily recommend to you, when baking for an event I stick to what I know. So, there are no new recipes or experiments to share – just the process that I go through when baking in bulk for events.
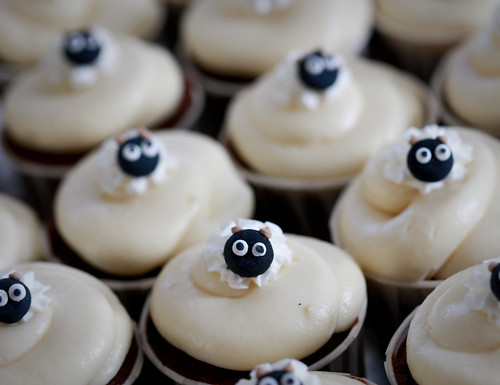
I decided to bake for an event for my daughter’s preschool (even though she doesn’t officially start until September). The event was a country fair and the highlight would be the sheering of the two school sheep. (Yes, there is a school in the middle of San Francisco with two sheep…) This is the basic process I followed and have followed in the past.
Step 1: Find inspiration and come up with a high level plan
Whenever I am asked to or offer to bake for an event, I always look for at least one bit of of inspiration. If the event is for a person, I might ask their favorite color. Or if I know the person well, I will use whatever color I associate with them. I will look to something special about the event for inspiration. Is it themed for example. Flavor-wise I tend to just ask – are you a chocolate person? What’s your favorite fruit? Spice? Etc.Step 2: Write out all your recipes
In this case, my starting point was sheep. So I did some googling and came across the PERFECT little sheep already done up for me in royal icing. I wanted to have both a chocolate and non-chocolate cupcake and something color-wise to contrast. I thought brown plus green would be a nice combo, so I quickly settled on vanilla cupcakes with green tea frosting and chocolate cupcakes with salted caramel frosting. The wonderful eBay shop owner, Lisa, hooked me up with a custom order and made up a bunch of sheep and birds shipped individually packaged and shipped all the way from the UK. The school also has chickens, but I settled for birds as I knew she could make them.
At a minimum you should print out all your recipes with the correct quantities. I also recommend writing them out as this ensures you read the recipe through and orients you to the steps involved, the equipment you will need, etc. I tend to write out my recipes like this and cross things out as I do them so I don’t forget. Most standard cupcake recipes make 24 or so cupcakes – at least on my blog. Sometimes I will halve them and make only 12. Usually for events you are baking a lot of cupcakes. This is where it gets tricky for the home baker. You really should make NO more then 30 to 36 at a time. Most mixers can’t accommodate more batter than that and you don’t want to over stuff the home oven. So do know that if you are making 100 cupcakes you likely have to make them in 3 batches. Professionals have quite an edge with their jumbo mixers and large, commercial convection ovens. Baking in bulk at home is a pain and I really try to avoid it. That said, I do occasionally give in…
When changing the quantities of a recipe start with the eggs. If there are 3 eggs in the recipe don’t halve the recipe for example. Either multiply everything by 1/3 or 2/3s. Regardless, get ready to do some fractions. Google can also help with this. Just be careful, check your math, and write everything down clearly.

Step 3: Prepare a plan and your ingredients
Now that you have your recipes you need to write down your shopping list and come up with a plan of action. The shopping list is pretty easy. So I won’t cover that, although I do write out my shopping lists in the order in which I will come across the ingredients at the grocery store – but that’s me – and I am a bit anal about being “efficient”. The important thing is to plan what you will bake when. If you are an amateur baker such as myself, you likely have a demanding full-time job and/or have a family to take care of. So it’s likely you won’t have the large swath of free time it will take to get something like this done in one go.Step 4: Prepare all the recipes and store them for final assembly
I always start from the time of the event. I like to leave assembly for the day of the event and usually leave an hour or two for assembly and packing assuming I am making 100 or so cupcakes. If the event is at 11am on a weekend for example, plan on getting up early and focusing on assembly. If the event is in the afternoon, say 3 or so, you can plan on finishing up some recipes the morning off. Regardless, leave plenty of buffer for unexpected events. This will definitely help minimize stress.
This event was on Saturday at 11am, so I wouldn’t have the weekend to work and would just have the morning to assemble. I had to bake after work during the week (my least favorite time). I try to spread the work out as much as I can without having to resort to freezing anything. Buttercream and chocolate ganache frostings can store in the fridge well covered up to three days. Cupcakes also store in the fridge well covered up to three days, but I like to bake them as close to the event as I can. So, I tend to do the frostings first. One note: meringue frostings don’t store well. So forgo them when you are doing a large project.
I always try to fill and frost the day of the event if I can, the night before if its for very early in the morning or I am taking them to work. In this case I started on Wednesday with frostings, made a batch of cupcakes Thursday, and another on Friday. I assembled on Saturday morning. I purposefully didn’t make these filled cupcakes as that basically doubles the work involved. Making the fillings takes more time, but doing the actual filling can be very time-consuming. I have filled cupcakes when making about 120 or so once, but it was for a wedding and it was before I had a child and other demands on my time. In those days I could spend the entire weekend in the kitchen without a second thought. Those days are over… Take on what you can manage without causing undo stress.
A bit earlier I recommended baking in 30 to 36 cupcake batches in order to avoid disaster. I still recommend that. I rarely heed my own advice and made 2 batches with about 46 cupcakes in each batch. I have a larger sized mixer, but it was still a challenge. Don’t even attempt doubling a standard recipe if you don’t have a 6-quart mixer.
I managed the over-stuffing of the oven by starting off the baking at 375 with the convection fan on. You just have to be careful to lower the temp and/or turn off the convection at the right time. And the right time is pretty hard to determine. I usually turn the oven back down to 350 after a few minutes and turn off convection around 12 minutes. I find if the oven isn’t hot enough the cupcakes tend to overflow. But really, you should just bake in batches of 30 to 36 (which is about 1.5 times a normal recipe you see on my blog). The last thing you want after all that work and all those ingredients is a bunch of overflowed cupcakes. A couple is fine – that happens to me and those cupcakes tend to be the taste testers. On that note, always make more than you absolutely need. In this case, I was aiming for a number but had flexibility.
Like I mentioned, I absolutely recommend baking and storing for assembly as close to the event as possible. If you can do it all in one day, great. But for me and perhaps many of you, it’s not possible. With the frostings, I tend to just transfer the frosting into a bowl and wrap well with plastic wrap and store it in the fridge. With the cupcakes, I let them cool all the way off then put them back on a sheet pan and wrap that very well with plastic wrap. If you have enough tupperware to store all your cupcakes even better, but I don’t. If you must bake more then 3 to 4 days before the event you can freeze them (I wrap them in plastic wrap in small quantities that can fit in freezer bags) but there will be some dryness after thawing. So I recommend not doing it.

Step 5: Assemble, pack for delivery, unpack and present
I won’t cover assembly much other then watch for cupcake toppers that will work for your event. For example, fresh fruit doesn’t hold up very well. It can dribble juice on your cupcake or start to look old. Candied fruit works as do sugar toppers. I tend to top my cupcakes with something simple that alludes to the flavor of the cupcake, but for some events – like a kids fair – I will do (or purchase) a more typical decoration.
I pack all my cupcakes in cupcake boxes with inserts that have individual holes for each cupcake. I bought the boxes in bulk (about 200 boxes) and it will be a while until I will run out. But many places sell paper or plastic cupcake containers in smaller quantities. I recommend going for a good box as it will help hold them in place and avoid delivery disaster. You will still need to watch for bumps in the road, but not have to worry about sliding. I also stick with disposable boxes for events given I have found it difficult to get my more permanent containers back promptly. Its totally up to you, just pack them carefully so they arrive safely.
Lastly, you may need to think about display. Thankfully there are many sites out there that have both disposable and non-disposable tiered cupcake holders. I also had a vintage, wood cupcake stand that I used for a few events. Usually its a challenge to get more then 30 or so cupcakes on these things, unless they are monstrous. I tend to put what I can on the tiered display and fill out the rest on the table around it. For this event I new I would have a hard time getting anything back given we hadn’t started at the school, so I settled for a something disposable.

Well, that is all that came to mind. If anyone has any questions around something I may have missed, feel free to post it. I might have missed something…
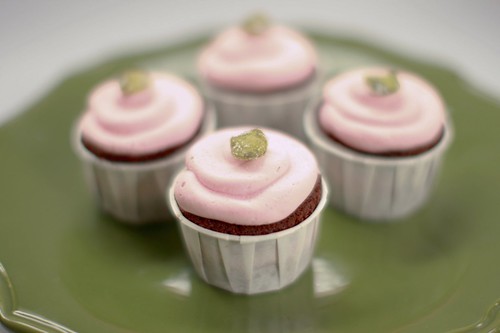
Pink Salt & Pink Pepper Cupcakes

These cupcakes sound more challenging to the palate then they are. I think it’s all the chocolate… The foundation of this cupcake includes two basic recipes – chocolate cupcakes and chocolate ganache. I decided to use the low-flour chocolate cupcake recipe I like and to sub out the wheat flour for quinoa flour and make them gluten-free. No one noticed a difference. If you are looking to make gluten-free, this is a great recipe to use. Your gluten-free friends will be very happy.
I really thought this recipe would end up being all concept with no real flavor excitement, but I was wrong. The pink peppercorn cream paired extremely well with the salted toffee. Those two things with the chocolate were just great. A couple of people weren’t into the pepper flavor and just scooped out the filling and ate the rest, but for the most part everyone enjoyed the cupcake. So, I guess whether or not this combination is a challenge to the palate depends on who you are. So far only the wasabi, white chocolate cupcakes I made in 2008 were too much for me…
Gluten-Free Chocolate Cupcakes
~28 regular-sized cupcakes / 350 degree oven
7 ounces (200 grams) Valrhona 85% cacao (or any bittersweet chocolate)1. Chop the chocolate and transfer into the bowl of a standing mixer.
3 sticks (343 grams) butter
2-1/4 cups (445 grams) sugar
8 eggs
1-1/4 cups (180 grams) quinoa flour, gluten-free (or all purpose flour for non-gluten free)
1/4 cup cocoa powder, unsweetened
1-1/2 teaspoons baking powder
1/4 teaspoon salt
1 teaspoon xanthan gum (if using gluten-free flour)
2. Add the butter to the chocolate and place the bowl over a pan of simmering water. Stir until the chocolate melts and the butter is combined.
3. Remove from heat and stir in the sugar. Let the mixture cool for 10 minutes.
4. Measure out the flour, cocoa, baking powder, salt, and xanthan gum (if using) into a medium-sized bowl. Whisk together.
5. Transfer the cooled chocolate/butter mixture to the electric mixer and beat for 3 minutes.
6. Add one egg at a time, mixing for 10 seconds between each.
7. Add the flour mixture and mix to combine.
8. Scoop into cupcake cups only 2/3s full. Bake all the cupcakes at 350 F for 25 minutes or until a toothpick comes out clean.
Note: If the oven is not hot enough than these cupcakes may over-flow. One way to be safe is to either fill 2/3′s full or another trick I use is to preheat to 375, then drop the heat to 350 once I put the cupcakes in. I also rotate the pans after 15 minutes of baking. It is safe to gently move them at that point and I find the lower back of my oven to be a bit cooler.
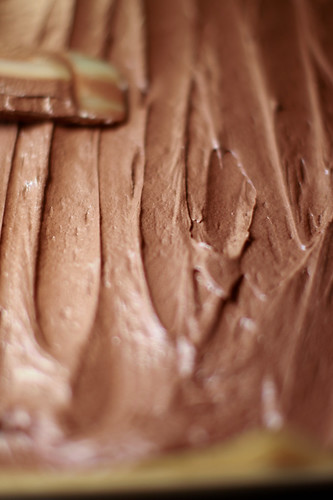
Chocolate Ganache
9 ounces bittersweet chocolate like Valrhona 61% cocao1. Chop chocolate and transfer into the bowl of your standing mixer.
1 cup heavy cream
1 teaspoon vanilla
1 tablespoon butter
2 cups powdered sugar
2. Heat cream until bubbles form around the edge of the pan, pour cream over the chocolate.
3. Let sit for 1 minute then stir until combined.
4. Add vanilla and butter. Stir until butter is melted. Let cool to room temperature.
5. Sift the powdered sugar into the bowl and mix until fluffy.
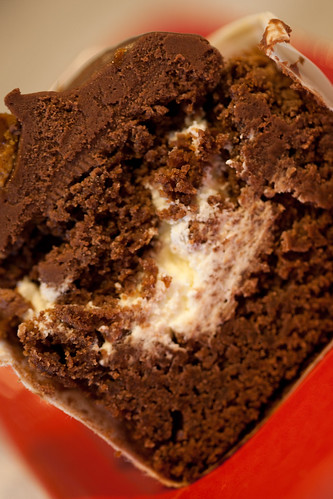
filled cupcake
Pink Peppercorn Cream
1 cup heavy cream1. Whisk cream until soft peaks form. Add sugar and whisk until combined.
2 tablespoons sugar
pink peppercorn
2. Add grindings of the pepper tasting occasionally until you are happy with it. I made it fairly strong as its a small component to the cupcake and will otherwise get overpowered by the chocolate.
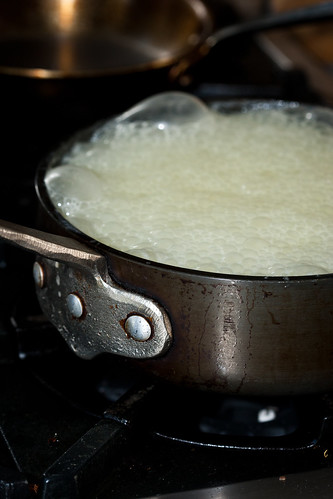
toffee in the making
Salted Toffee
3/4 cup heavy cream1. In a medium saucepan over medium-high heat, bring everything to a boil. Stir until the sugar is dissolved.
1 tablespoon water
1 cup sugar
1-2 tablespoons large grained salt
2. The mixture will start to boil with vigor. Do not stir. Let the mixture boil over medium-low heat until the mixture turns a deep nutty brown, about 20 minutes
3. Pour on to a prepared baking sheet (either covered in a silpat or oiled parchment paper). After a minute or so, sprinkle with salt. I used pink, Hawaiian salt.
4. Leave it to cool.
5. After the toffee has cooled, break it into small chunks.
Note: I like my toffee very dark – almost burnt. Getting the toffee just right for your taste can be a challenge. I think a nutty brown is a good place to start. One additional warning, if you cook it very long you could nearly ruin your pan or at a minimum create bunch of cleanup work for yourself. Don’t use your favorite pot or pan!
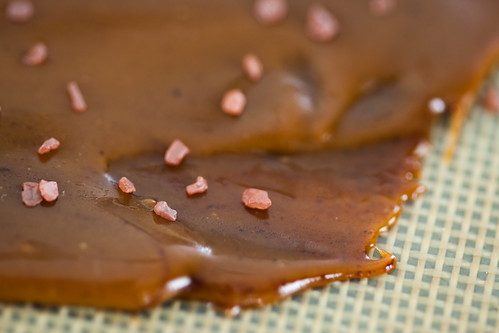
salted toffee
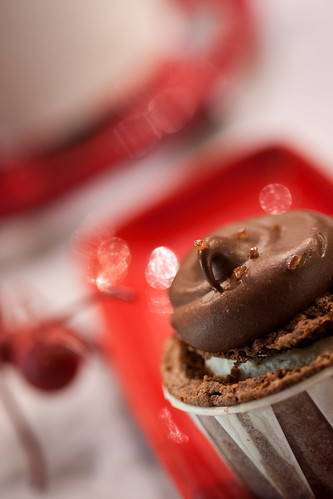
Assemble
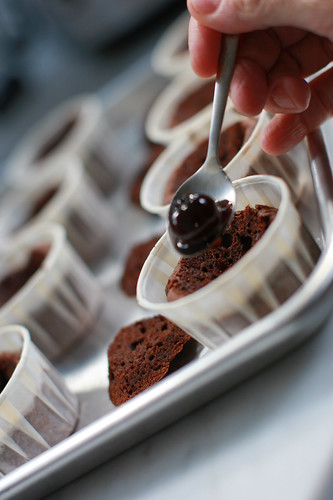
1. Fill the cooled cupcakes using the cone method.
2. Frost.
3. Top off with the toffee chunks, a little more salt (if desired), and a decoration (if you want).
No comments:
Post a Comment